
Getting Started with NVIDIA NemoClaw on PapayaClaw
Getting Started with NVIDIA NemoClaw on PapayaClaw
At GTC 2026, NVIDIA unveiled NemoClaw — an open-source stack that brings enterprise-grade security, privacy, and local inference to OpenClaw AI agents. In this guide, we'll walk you through what NemoClaw is, why it matters, and how to get it running on PapayaClaw step by step.
What is NemoClaw?
NemoClaw is NVIDIA's official plugin for the OpenClaw agent platform. It installs NVIDIA Nemotron models and the OpenShell runtime with a single command, wrapping your AI agents ("claws") in multiple layers of security and privacy controls.
Think of it this way: if OpenClaw is the operating system for personal AI agents, NemoClaw is the security and performance layer that makes those agents trustworthy, private, and production-ready.
Key Features
- Local Inference: Run NVIDIA Nemotron models locally — no token costs, no data leaving your machine.
- Sandboxed Execution: Every agent runs inside an isolated OpenShell container with filesystem, network, and process-level restrictions.
- Multi-Layer Security: Combines Landlock, seccomp, and network namespace isolation (netns) for defense in depth.
- Privacy Router: When you need cloud models, NemoClaw routes requests through a controlled inference gateway — no direct API calls from inside the sandbox.
- Hot-Reloadable Policies: Update security and network rules at runtime without restarting your sandbox.
- Policy-as-Code: Declarative, auditable security configurations you can version control.
Architecture Overview
NemoClaw is composed of four layers:
- Plugin Layer — A TypeScript CLI for sandbox lifecycle management (
launch,connect,status,logs). - Blueprint System — Versioned Python orchestration artifacts that configure sandbox creation, security policies, and inference providers.
- Sandbox Environment — Isolated OpenShell containers running OpenClaw with policy enforcement.
- Inference Gateway — Routes all model API calls through NVIDIA's cloud infrastructure or local Nemotron models.
Hardware Requirements
This is where it gets important. NemoClaw has specific minimum requirements:
| Resource | Minimum | Recommended |
|---|---|---|
| CPU | 4 vCPU | 4+ vCPU |
| RAM | 8 GB | 16 GB |
| Storage | 20 GB free | 40 GB free |
The sandbox image alone is approximately 2.4 GB compressed. During deployment, Docker, k3s, and the OpenShell gateway run alongside the export pipeline, which buffers decompressed layers in memory. Systems with less than 8 GB RAM risk triggering the OOM killer.
Why You Need the PapayaClaw Pro Plan
Looking at PapayaClaw's plans:
| Basic Plan ($11.90/mo) | Pro Plan ($17.90/mo) | |
|---|---|---|
| vCPU | 2 | 4 |
| RAM | 4 GB | 8 GB |
| Storage | 40 GB SSD | 80 GB SSD |
The Basic plan (2 vCPU / 4 GB RAM) does not meet the minimum requirements for NemoClaw. You need at least 4 vCPU and 8 GB RAM, which is exactly what the Pro plan provides.
With the Pro plan you get:
- 4 vCPU — Meets the minimum CPU requirement.
- 8 GB RAM — Meets the minimum RAM requirement for stable operation.
- 80 GB SSD — More than enough for the sandbox image and model files.
- Priority support — Get help when you need it.
- Exclusive templates — Including NemoClaw deployment templates.
Our recommendation: If you plan to use NemoClaw, go with the Pro plan. The Basic plan simply doesn't have enough resources to run the sandbox reliably.
Software Requirements
Before installing NemoClaw, your PapayaClaw instance needs:
- Ubuntu 22.04 LTS or later (included with all PapayaClaw plans)
- Node.js 20+ and npm 10+
- Docker installed and running
- OpenShell runtime
Step-by-Step Installation Guide
Step 1: Subscribe to the Pro Plan
Head to PapayaClaw Pricing and subscribe to the Pro plan ($17.90/month). Once your instance is provisioned, connect via SSH or Telegram.
Step 2: Connect to Your Instance
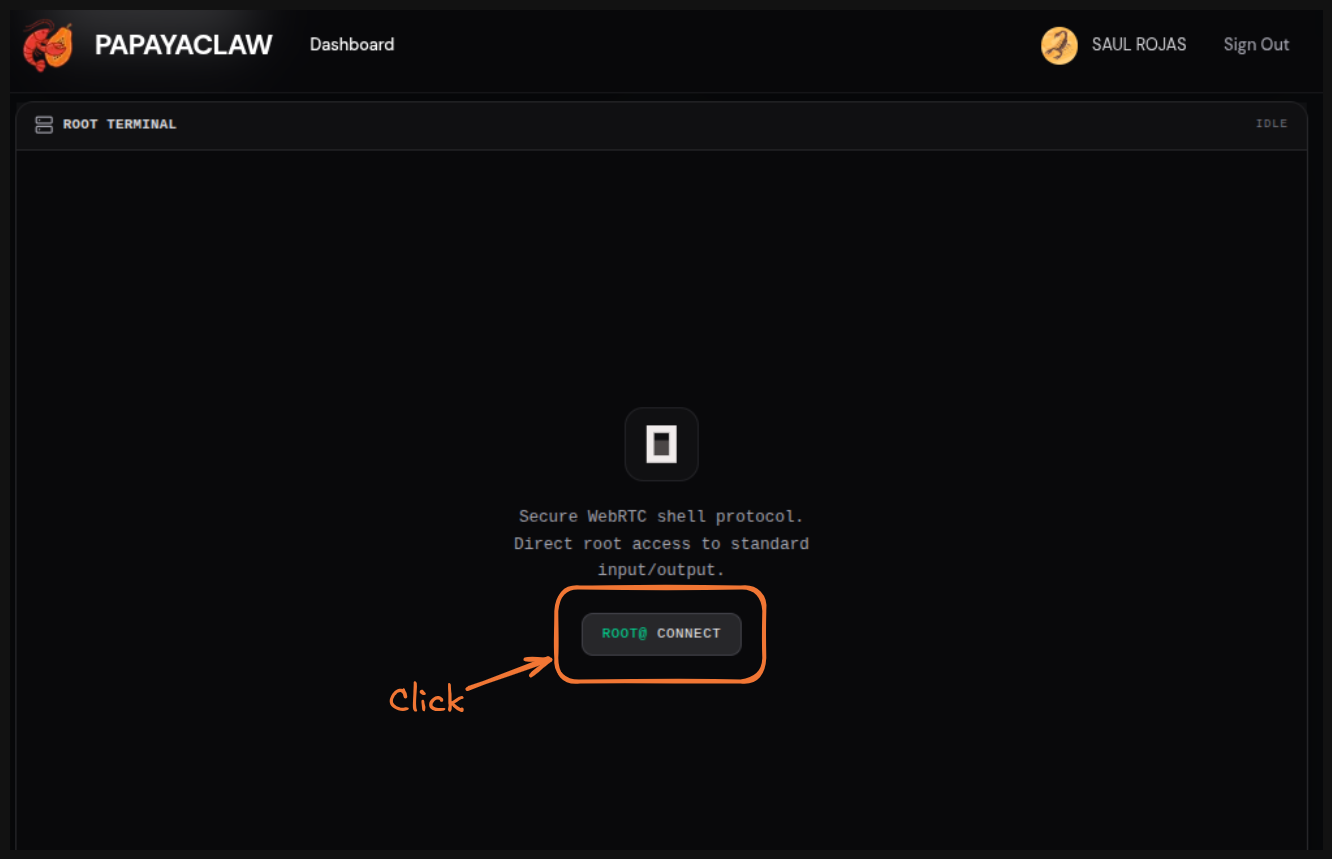
You can connect via SSH or directly from the PapayaClaw dashboard. In the dashboard, navigate to the Root Terminal and click the ROOT@ CONNECT button:
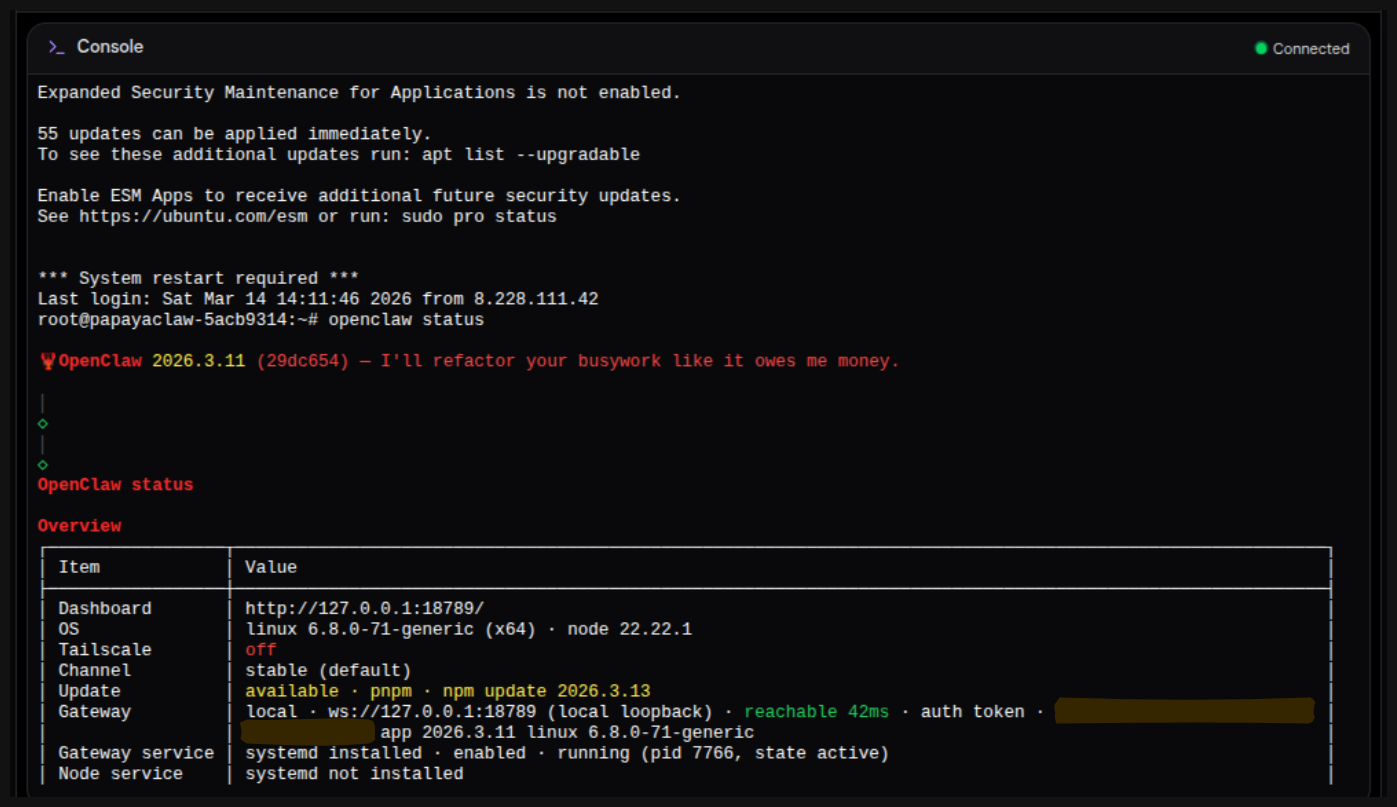
Once connected, you'll see the terminal with the OpenClaw status and system information:
Step 3: Ensure Docker is Running
docker --version
# Should output Docker version 24.x or later

sudo systemctl status docker
# Ensure it shows "active (running)"
Step 4: Install NemoClaw
Run the single-command installer:
curl -fsSL https://nvidia.com/nemoclaw.sh | bash
This script will:
- Check and install Node.js if needed.
- Launch an interactive onboarding wizard.
- Create your sandbox environment.
- Configure inference settings.
- Apply default security policies.
Step 5: Complete the Onboarding Wizard
The wizard will ask you to:
- Name your sandbox — Choose something descriptive like
my-assistant. - Select an inference provider — Choose between NVIDIA Cloud API (recommended for Pro plan) or local models.
- Enter your API key — Get one free at build.nvidia.com.
- Configure security policies — The defaults (Landlock + seccomp + netns) are recommended.
After completion, you'll see a summary like this:
  ┌──────────────────────────────────────────────┐
  │   NemoClaw Deployment Summary                │
  │                                              │
  │   Sandbox:    my-assistant                   │
  │   Security:   Landlock + seccomp + netns     │
  │   Model:      nvidia/nemotron-3-super-120b   │
  │   Provider:   NVIDIA Cloud API               │
  │   Status:     Running ✓                      │
  └──────────────────────────────────────────────┘
Step 6: Connect to Your Sandbox
nemoclaw my-assistant connect
This drops you into the isolated sandbox shell:
sandbox@my-assistant:~$
Step 7: Start Using Your Agent
Interactive chat (TUI):
openclaw tui
Single command:
openclaw agent --agent main --local -m "Hello, help me write a Python script" --session-id test
Check status anytime:
nemoclaw my-assistant status
Supported Models
| Model | Parameters | Best For |
|---|---|---|
| Nemotron 3 Super | 120B (12B active) | Full-featured agent tasks |
| Nemotron 3 Nano | 4B | Lightweight, local-only tasks |
| Mistral Small 4 | 119B (6-8B active) | Alternative general-purpose |
| Qwen 3.5 | 27B / 9B / 4B variants | Multilingual tasks |
Note: Running large models locally (like Nemotron 3 Super 120B) requires significantly more VRAM than what PapayaClaw instances provide. For the Pro plan, we recommend using the NVIDIA Cloud API for inference and keeping the sandbox for secure execution.
Security Deep Dive
NemoClaw's security operates on four layers:
- Network Layer — Blocks all unauthorized outbound traffic. Any unapproved connection attempt surfaces for operator approval.
- Filesystem Layer — Restricts access to
/sandboxand/tmponly. The agent cannot read or modify system files. - Process Layer — Prevents privilege escalation and blocks restricted syscalls via seccomp profiles.
- Inference Layer — Intercepts all model API calls and routes them through controlled backends, preventing data exfiltration via prompt injection.
Important Notes
- NemoClaw is currently in alpha. Expect interface and behavioral changes.
- A fresh OpenClaw installation is required — NemoClaw doesn't support upgrading existing installations yet.
- Licensed under Apache 2.0 — fully open source.
- Community support is available on the NemoClaw GitHub repository.
What's Next?
Once you have NemoClaw running on your PapayaClaw Pro instance, you can:
- Customize inference providers — Switch between local and cloud models.
- Fine-tune security policies — Adjust network rules and filesystem access for your use case.
- Monitor sandbox activity — Use the OpenShell TUI for real-time monitoring.
- Deploy multiple sandboxes — Run different agents with different security profiles.
Ready to get started? Upgrade to Pro and deploy your first secure NemoClaw agent today.
NemoClaw was announced at NVIDIA GTC 2026 on March 16, 2026. For the latest documentation, visit the official NemoClaw docs.